Stash Bust Challenge Update: Aug. 2013

WHOooo’s Stash Busting?

P1020887 (750x543)I fell a little behind in my stash busting for June and July.  Although I made a lot of  hats for Halos of Hope, I didn’t use the Bernat CottonTots in my Stash Bust Challenge.  I plan to make up for it this month.  I have a current design I’m working on and a magazine deadline (yeah!) to meet, but I hope to squeeze in a couple more hats this month.  I did spend this weekend working on two cuties.  The design is from Sarah Zimmerman and you can get the pattern here: Crochet Owl Hat.  I made some modifications to the hat design to make it work with my smaller scrap pieces (you can see my notes here).  Overall, I’m real pleased.  It’s a fun, quick hat to make.  Together, they weigh in at 4 1/2 ounces.

Total Stash Bust Yarn Used to Date: Just over 3 pounds!  Officially 1/2 way done!

Total Stash Bust Hats Made to Date: 15

1 Fish, 2 Fish, Sweet Fish, Scary Fish

Introducing the Black Piranha Monster Fish Hat Pattern!

Aww, what a cutie!

Aww, what a cutie!

They are cute, in a creepy kinda way.  You gotta love the piranha.

My latest pattern, the Black Piranha Monster Fish Hat is available in three sizes.  Each size has instructions to make with or without earflaps, you choose.

Small: fits approximate 19”-20½” head circumference (3 years-6 years)
Medium: fits approximate 20½”-22” head circumference (5 years-teen/adult)
Large: fits approximate 22½”-24” head circumference (Large adult)

COUPON! for a limited time, from now until July 31, 2013 midnight EST, you can get the sweet fish for free when you buy the scary fish!  On Ravelry only, use coupon code 1FISH2FISH and get the Kissy! Kissy! Fish Face Hat Pattern for free when you buy the Black Piranha Monster Fish Hat Pattern.

Mid-year Resolutions Check In

Resolutions Check-In

We are officially over 1/2 way done with 2013, yikes!  I thought I’d better check in on my 2013 Crochet Resolutions and see how I’m holding up to them.

1. Work from yarn stash and only purchase yarn when absolutely necessary for a specific project; don’t buy yarn just because it’s on sale!  I already started this with my Stash Bust 2013 Challenge.

I’ve pretty much stuck to this one.  I recently grabbed up some clearance yarn-one of my favorites-but then found the willpower to “just say no” and gave them back to the cashier at check out.  I’ve bought some yarn, but only for specific patterns and have returned yarn that was purchased for a project and then not needed.

2. Complete the Crochet Guild of America’s Master Crochet Program.

Not there yet. I’m looking to sign up in August.

3. Complete at least 2 hats per month for Halos of Hope.

Yup, I’ve done that and more most months.

4. Self publish at least 8 new patterns.

On track for this.  So far, in 2013, I’ve self-published:

Actually, that’s 8!  Wow, I didn’t realize I did so many the first 6 months of the year-I’ve been busy!  And I re-released Mr. Springy, The Robot Hat too!

5. Learn to crochet with my left hand.  I’ve been “in training” for this by learning to use the mouse with my left hand.

Still in training…

6. Complete that scrap felted throw rug I’ve been wanting to make for a couple of years now!!!

Haven’t started this either.

10 days – 17 states – 4,272 miles – 21,384 stitches

ROAD TRIP!

P1020370 (750x563)

Before Road Trip

My family and I recently went on a road trip.  We drove from north Georgia to Yellowstone National Park with a number of stops along the way there and the way back.  It was a great trip and we saw some amazing sights and created memories that will last a lifetime.

Some of the sights we saw were

After Road Trip

After Road Trip

  • St. Louis Arch
  • A jackalope (I love them!)
  • Badlands National Park
  • The straightest road ever created running from South Dakota to North Dakota
  • Pump jacks pumping oil in North Dakota
  • Windmills as far as the eye could see in Minnesota
  • The gorgeous Black Hills of South Dakota
  • Mt. Rushmore
  • Crazy Horse Memorial and the annual June Night Blast
  • The Rocky Mountains
  • Buffalo
  • Old Faithful (erupted on time!)
  • Mud pools and geysers and hot springs
  • Buffalo
  • A grizzly bear
  • Devil’s Tower
  • A prairie dog town
  • A hail storm like none I’ve ever experienced before
  • A missile silo
  • Buffalo
  • Breathtaking Grand Teton National park
  • An end-to-end rainbow
  • Buffalo
  • Chicago rush hour-ugh.
  • The Big Sky of Montana
  • Bear Tooth Pass from Montana to Wyoming-amazing drive
  • Snow skiers and sleders and snow gliders in June

My husband planned the entire trip and drove all 4,000 miles.  We had a number of detours as he is an avid geocacher and has a goal of finding a geocache in all 50 states (I’m really looking forward to Alaska and Hawaii!).  I sat back, enjoyed the ride (except for the hail storm and Chicago’s traffic), crocheted and read.  I had plans of getting more crocheting done but the sites were too amazing to pass up.

Hike in Custer State Park, South Dakota

Hike in Custer State Park, South Dakota

If you are lucky enough to live in the Black Hills of South Dakota or in Wyoming with a view of the Rockies, you may find me as your neighbor in a few years.

It was a beautiful adventure and I hope to visit again.

Coupon-Independence Day

StarFlowerHat-001 (750x750)Celebrate Independence Day with a Patriotic Star Hat!

Great Slouchy Style hat comes in three different sizes to fit most 3 years old to adult (head circumference 19″ to 23 1/2).

Coupon code valid July 4, 2013 to July 6, 2013 Eastern Standard Time and valid on Ravelry only.

Use this link: Stars and Flowers Slouch Hat and insert the coupon code at check out.

Coupon Code: IndependenceDay

Thank you!  Have a safe and fun day!!!

Darleen

Starting Crochet-Working in the Back Bump, video how-to

Working in the Back Bump of your Starting Chain

I’m a fan of working in the back bump of a starting chain.  It creates a finished edge on the starting chain which matches the top edge of the row.  It looks nicer and I think creates a more flexible starting chain with fewer gaps.

As always, the easiest way to learn something is to have someone show you-thank you internet for giving us this ability!  (In addition to being a crochet addict, I’m a bit of a geek, if you haven’t already figured that out…)  So I have spent my day off today (yeah! a day off) trying to figure out how to film a video and upload to my website.  Hopefully, this will work and I’ll be able to show you this awesome method.

Here it goes!

Buy 2 Get 1 Free on Ravelry, Crochet by Darleen Hopkins

Stash Bust Update: April/May 2013

Stash Bust Update, April and May 2013

When I sat down to write this I realized I didn’t post an update for April.  I guess it’s because although I made a lot of hats for Halos of Hope in April, I didn’t make any hats out of my Bernat Cottontots stash.   But I do have 3 Stash Bust hats for May.

P1020222 (890x1000)First, Hooper the Shark.  I love this pattern by Monica Miles.  She designed it for Halos of Hope and you can own it with a $10 donation to this great charity.  The money goes directly to them and is used to pay for postage in shipping their hats.  I made a couple adjustments to the pattern for worsted/aran yarn (it’s written for bulky).  You can see my adjustments on my Ravelry project page.  And if you have friends who knit, they have a knitted version as well!


P1020228 (1000x1000)My second hat is Oink!  I made this one on the bus going to and from my youngest son’s field trip.  We had a nice day-went to Chattanooga, TN and saw Ruby Falls, an underground waterfall and went to the aquarium.  Three hours on the bus each way and I had more than enough time to finish this cutie.

P1020156 (750x750)


My last one to share with you is a bucket style hat.  I was playing around yarn and didn’t follow a pattern.  It came out kinda cute.  There may be a Bucket Hat pattern in the future…

The 3 hats together weigh in at exactly 12 ounces.

Total Stash Bust Yarn Weight to Date: just under 3 pounds! (almost 1/2 way!!)

Total Stash Bust Hat Count to Date: 13

P1020165 (750x1000)And for kicks and giggles, here’s a photo of Ruby Falls. : 0 )

Eyes, Getting them Right, Part III, Crocheted Eyes

Part III in Eyes, Getting them Right

Capturing the right eye look for your crocheted creation may be as easy as  baby safe yarn stitched eyes or cute button eyes.  Or it may require something a little bit more than either of these.  For those times when you need just a little bit more, crocheted eyes are the solution.  And, just like anything you make with yarn, your possibilities are endless.

P1010961 (750x563)

P1010779 (1000x997)Mix it Up! Patterns will include instructions on how to make crocheted eyes.  But once you have made a couple, mix and match different eyes with different patterns for an endless variety of options.  My Kissy! Kissy! Fish Face pattern comes with instructions for 2 different eye options.  Same basic pattern but look at how different the two fish are with a small change in the eyes.

P1020025 (809x1000)Add Twinkle!  Probably my favorite part about crocheted eyes is the option to add a little twinkle to the eye.  With the tiniest amount of white yarn, your eyes go from bland to laughing eyes.  And you can use this twinkle to have the eyes looking in one direction.  I use the beginning tail (white) and make two tiny stitches at about a 120 degree angle.  The result is adorable.  He can look up, down, to the side or cross-eyed with this technique.  You do have to be careful.  If the twinkle in both eyes isn’t lined up just right, your critter will look “off”.

P1010130 (1000x1000)P1010663 (500x500)Crocheted Skull Hat100_6647 (550x371)Explore your Options! With crocheted eyes, you are only limited by your imagination.  Keep a folder-physical or virtual-of all your different eye patterns.  After you have a collection, start exploring.  Mix and match or come up with something totally new and unique.

Pros: Endless possibilities!

Cons: Takes a little longer to do and you may need to follow a pattern to get the right look.

IN SUMMARY

Whichever eye option you chose, make sure you do the following:

  • Keep the eyes even.  You want your hat/doll/whatever you are making to be silly, not odd-looking.  I always add 1 eye, then follow the same round/row to the spot where the next eye should be.  Also, I don’t work in the ends until I am certain the placement is correct.
  • For hats, eyes placed closer together is better than farther apart.  Hats will stretch when worn thereby adjusting the placement of the eyes.  Try the hat on before committing to the final placement (ie working in all ends).
  • Have fun with it!

Eyes, Getting Them Right, Part I-Yarn Stitched

 “The Eyes are the Mirror of the Soul”

Getting the eyes right on your goofy hat, bib or doll can make or break the cuteness factor of your creation.  Choosing the right eye may depend on the recipient of the item, it’s intended use or what items you have on hand.  I have three favorite easy and inexpensive methods for creating eyes; yarn stitched eyes, button eyes and crocheted eyes.  This series of blog posts will discuss the pros and cons of each method, as well as some overall tips to use and pitfalls to avoid when attaching the eyes.

100_6154Yarn Stitched

Just a little bit of yarn can convey an expression-happy, angry or laughing.  Make your doll asleep or stitch an “X” and turn her into a zombie.  Yarn stitching is a simple form of embroidery.  My Happy Pets hat uses a real simple eye to create happy, smiling eyes.  It’s basically a stretched out tip of an arrow.

Sleeping eyes are a snap with a little contrasting yarn.

Sometimes, with a doll, all you need is a  tiny eye and a French knot would be perfect in this case.  I have a future pattern in mind where I will use this simple knot for the eye.  In the meantime, I found this great resource if you want to give it a try.

Attack eyebrows

Attack eyebrows

You can combine yarn stitching with other forms of eyes to add emotion.  My Attack Sock Monkey combines a button eye with a simple yarn stitched eyebrow slanted downward to show he’s in attack mode.

The hardest part about this method is working in ends so they aren’t noticeable on the outside or bumpy on the inside.  It is a very safe baby option  as there is no choking hazard at all. Do an internet search for “embroidered eyes” and click the “images” button for ideas.  You’ll find some beautiful, amazing, complex options but also some real simple variations that will be easy for you to duplicate with your own projects.

Pros

  • Uses left over yarn.
  • Baby-safe, no choking hazard.
  • Great option for items that will be washed a lot.

Cons

  • Can be tricky to learn the more complicated stitches.
  • Ends need to be worked in securely, invisibly and without bumps on the inside of the hat.
Muno by Michelle Vass

Muno by Michelle Vass

Here are a couple examples of other designer’s patterns (Rattle Monsters by Kristi Tullus and Muno by Michelle Vess) that use simple yarn stitched eyes.  I love the creativity!  Click on the photos to learn more about the pattern.

Rattle Monsters by Kristi Tullus

Rattle Monsters
by
Kristi Tullus

Next, Button Eyes

Eyes, Getting them Right, Part II-Buttons

Part II in Eyes, Getting them Right

My last post described yarn stitched or embroidered eyes.    Another super easy method to adding character to your creations is with button eyes.

Buttons

Buttons are easy, inexpensive options for eyes and one of my favorites. You can find projects that use a simple basic black button sewed with black thread to projects that use three different colored buttons stacked one on top of the other and backed with felt.  You know the saying, “Cute as a button”, well, there’s are reason for it!  Buttons are cute and crocheted critters with button eyes are even cuter.

I prefer buttons that have four holes for attaching rather than two.  They are more secure and I find the four holed buttons look better.  Maybe it gives a slight illusion of a pupil, not sure, but it is a preference of mine.

Mr. Springy, The Robot DudeTIPS

Use yarn to sew on the buttons.  If your yarn is worsted weight or thicker it will be too thick to use to attach the button.   A simple option is to split the plies of the yarn and use just one.  Try sewing on the button with a coordinating color.   For example, Mr. Springy has button eyes that are sewed on with the contrasting yarn used for his stripes.

Watch out for the types of buttons that attach at the back only.  If they both aren’t secured tight enough they will hang uneven and ruin the look of a project.  You may want to avoid using this type of button on a hat unless you used very thick yarn to crochet the hat.  It is possible for the back of the button to poke thru and irritate the scalp.

Be careful of your placement of the buttons on a hat.  If the hat is a gift or for donation, try the hat on after you placed the eyes to make sure they lay properly and are positioned in a natural way-not too far out to the sides.  Hats stretch when worn and sometimes what looks good laying flat doesn’t look so great when worn.

100_6208_medium2Have fun with buttons.  I made a Goofy Spider hat-he was purple and I wanted to give him red eyes.  I had two mismatched red buttons in my button bin.  I think they made him perfectly goofy looking.

100_6617 (640x640)
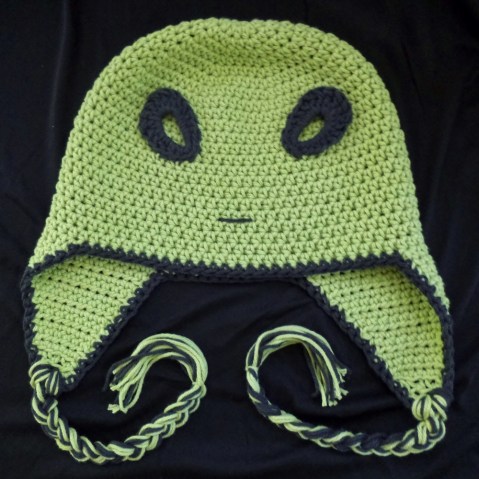
Get creative with your button options.  I had a hard time finding the perfect buttons for Blockhead Man.  I want flat shiny black buttons and all I had were ones with ridges.  So I flipped the buttons over, used the wrong side and they worked out perfect!

Pros

  • Cute, cute and more cute.  I love the homey feel button eyes give a project.

Cons

  • #1 Con, buttons are a choking hazard.  Do not use on items that will be given to babies younger than 3 yrs. old.

Next, Crocheted Eyes…
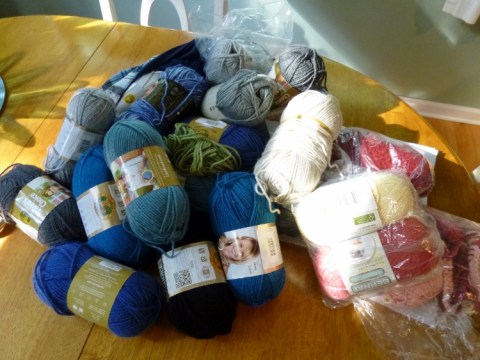