I love thrifting. Thrifting or buying secondhand is a great way to save money, prevent waste and support local nonprofits. And for those that are a little icked out by thrift stores, then please, instead of tossing your unwanted items in the trash, please, please, please donate them to thrift stores so those of us that aren’t bothered by the ick, can keep the cycle going.
Whenever I need something, I will often look at a thrift store first before buying new. And sometimes I just stop by local thrift stores to see if they have something I didn’t know I needed. 🙂 That’s what I did earlier this week. My husband and I had gone hiking at Project Chimp-if you are ever in north Georgia, check it out! We hiked the very steep white trail and were able to see a couple chimps from the observation deck using binoculars . We also heard them a lot while hiking. It was neat and I hope to one day manage to get tickets to one of their public events to see the chimps up close. After hiking we had lunch at a fantastic Cuban style restaurant in Blairsville, GA called Nani’s. Check them out if you are ever in the area-no website but Google it. The fried plantains and the Chicky plate are fantastic and consistently delicious. After lunch we went to a nearby thrift store that supports the local Humane Society. This place is huge. I was lucky enough to find a set of double pointed knitting needles and a skein of yarn for 50 cents each. Whenever I buy something at a thrift store, the first thing I do when I get home is clean it, aka remove the ick. The yarn didn’t appear dirty but had a slight smell like it had been in storage and therefore needed to be cleaned before using. So how do you clean a skein of yarn? Easy!
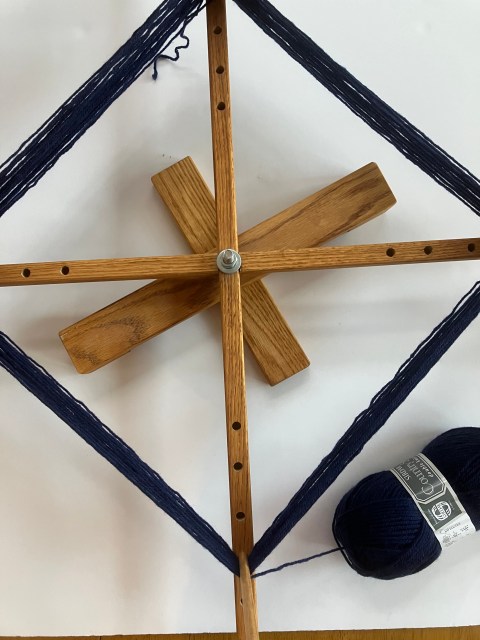
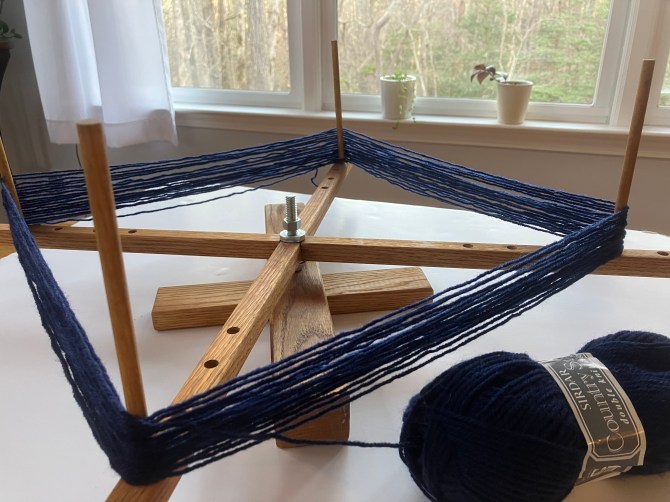
First, wind the yarn into a hank or a loose circle. I use my yarn swift but you can do this manually by winding the yarn onto the back of a chair or something else that will create a large circle of yarn. See photo below.
Next, tie the circle of yarn four or five times evenly spaced out around the circle. Make sure you tie up both ends of the yarn. The purpose of this is to keep the yarn together so make sure you knot the ties well.
Now wash the yarn! Check your yarn label for washing instructions. My yarn label stated machine wash and dry so I placed my circle of yarn into a mesh delicates laundry bag and washed and dried it along with some towels. I did remove the yarn from the dryer before the end of the cycle as I knew the towels would take a lot longer to dry than the yarn.
Once the yarn was fully dry, I placed it back on the yarn swift and wound it into a ball. Now the yarn smells fresh and is ready to use! It’s that easy.
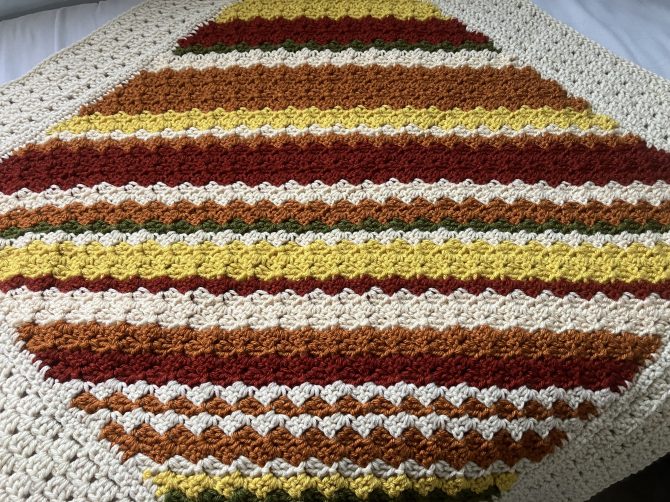
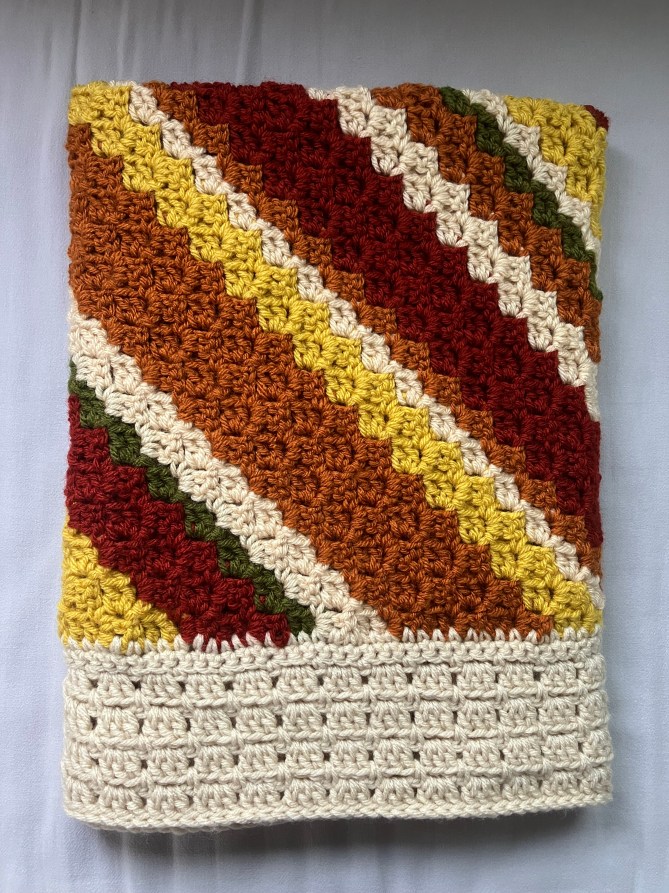
In my last post, I wrote about two baby blankets and two bears I made for the North Georgia Pregnancy Services Center. When I dropped of the two granny blankets and bears, I also included a third blanket and bear. This blanket was made with scrap/stash Lion Brand Vanna’s Choice yarn. For this blanket, I gathered all the Vanna’s Choice I had left in stash and separated it into two groups, muted cool colors and warm autumn like colors. I’ve been playing around with the muted cool colored yarn in a different project and will post about it once it is complete. For the the warm autumn like colors I decided to make a baby blanket.
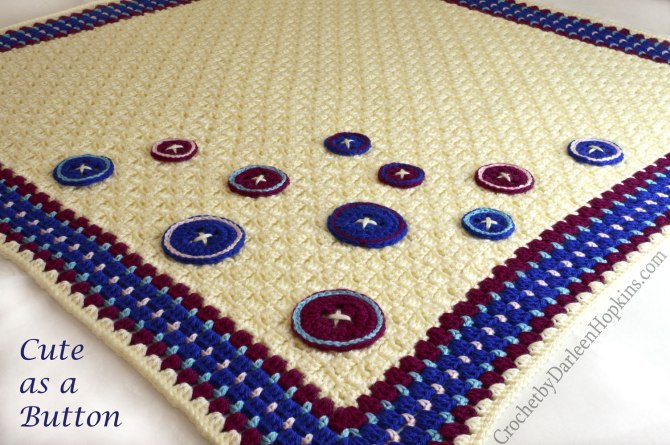
I used the Cute as a Button Baby Blanket as my pattern but had to mix it up some to make the pattern work with the yarn I had. Rather than making the middle a solid color as written in the pattern, I opted for diagonal stripes in order to use all the small amounts of multi-colored skeins. And, since the middle was made with a variety of color, I opted to make the edging solid rather than the multicolored edging as written in the pattern. Finally, I left off the buttons as with the striped center, buttons would have been too busy.
This pattern starts in one corner then increases until half the main section is made, then starts decreasing to finish the second half. My goal was to use as much of my scrap stash as possible without running out of yarn at the end. So I set aside the yarn I planned to use for the edging, weighed what was left, split it into two equal parts and placed into separate bags. The goal was to work the pattern increases until the first bag of yarn was used up then start the decreases with the second bag of yarn. This worked!
I was so excited to use this awesome yarn for a baby blanket that looked really cool. The edging was stitched with a different, but very similar yarn that was given to me. I’m glad I had it as it gave the blanket the perfect edging. And while I had A LOT of ends to weave in (seriously close to 90) I used up all but a teeny tiny bit of off white. Don’t worry, it will get used in a future project. 🙂
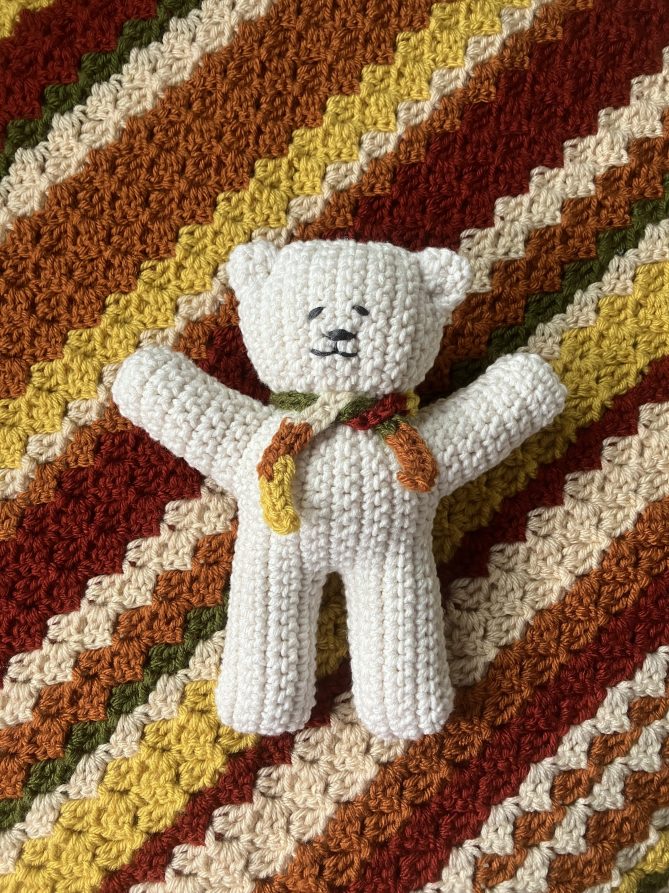
Once the blanket was done, I made another Easy Peasy bear to donate with it. I’m really excited with how well they came out and hope they find a nice home with a new mom and her baby.
With a little bit of imagination and creativity, you can make two items from the same pattern that look completely different! Modified version above and original pattern below.
Over the years I have posted about using up stash yarn on charitable projects. It’s now 2025 and yup, I’m STILL working on my yarn stash. At one time my yarn stash was HUGE. Not like yarn store big or anything, but somehow I had accumulated a lot more yarn than I had reasonable storage space for. So I’ve been working on it (for a number of years) a little at a time and I’ve recently completed six projects from stash that have been donated to a local charity. The charity is called North Georgia Pregnancy Services Center (The Center) and it provides some medical services and support to women who are pregnant and their newborn babies. When I stopped in the office to ask if they could use baby blankets I received an enthusiastic “YES!” as they like to include a handmade blanket in the package they give to each expecting mother using their services. I was super excited to hear this as I love to crochet for charitable organizations and very pleased to find a local organization to support.
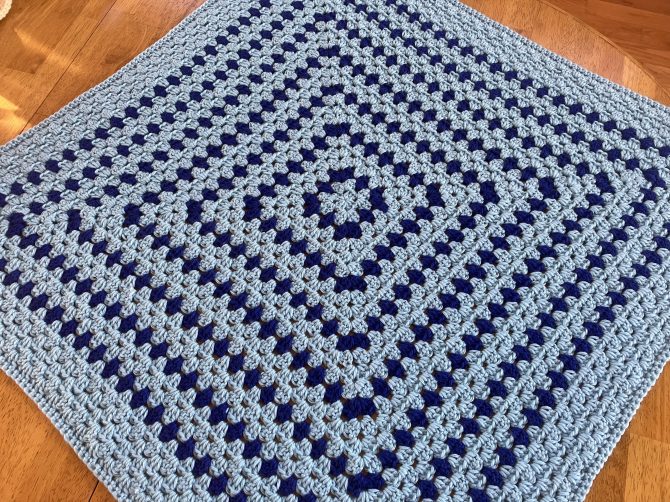
Last year I completed two granny square baby blankets with no recipient in mind. They were made with stash yarn-super soft Knit Picks/WeCrochet Mighty Stitch 80% acrylic, 20% superwash wool. I stored them for a few months until I decided what to do with them. Once I found out The Center would like them, my decision was made but before I donated them, I wanted to make bears with the leftover yarn from each blanket. I remembered the Easy Peasy Teddy Bears I made a number of years ago for a group called Team Lewis, read about it here. So I took some more stash yarn (yipee! using more stash!) combined it with the leftover Mighty Stitch, and made some coordinating bears.
Since I had made the two blankets a few months ago, I wanted to wash them before I dropped them off at The Center. After a little research, I found some lingerie bags on Amazon that are huge. They are perfect for washing handmade baby blankets. I bought six and decided from now on I will include one of these with each baby blanket I donate or give as a gift. The blankets washed up perfectly and were safe in the bags from washing machine/dryer damage. The bags I bought were 24″ by 24″ and about $10 for a pack of three. After the blankets were washed and dried, I added the washing instructions by cutting the information off the yarn label and securing it to the blanket.
The two blankets and two bears were dropped off along with a third bear and blanket. I’ll post about them next time. The Center was having a staff meeting when I came by and they all seemed really excited about receiving the donations. I’ll be making more for them and have already started on a fourth blanket with, of course, stash yarn.
Pattern information: The baby blankets are basic granny squares work with a pattern repeat of three rounds of main color and one round of contrasting color. Blankets were then edged with six-seven rounds (I had less blue than pink) of main color and finished with a round of sc and then a round of slst.
A couple years ago, the image below showed up in my Facebook feed with a challenge to use less plastic in during the month of July. Plastic drives me INSANE. I don’t want to use it but it has become almost impossible to avoid, particularly at the grocery store. Produce is pre-wrapped or pre-bagged in plastic, sour cream comes in plastic, lunch meat, bread, cereal, snacks are all packaged in plastic. Juice and vinegar and milk are bottled in plastic. It is EVERYWHERE. So what do you do when you want to do what is right for the planet and cut out plastic? That is where the 3 R’s come in. Reduce, Reuse, Recycle. Say it with me… Reduce, Reuse, Recycle. Did you notice recycle is last? It is last for a reason. Recycling, while better than tossing plastic in the landfill which leaches toxins into our ground water and may eventually find its way in our oceans, should be your last option. Recycling is expensive and uses energy. The best thing you can do is reduce your use of plastic. And when you have plastic, reuse what you have. And when you can no longer reuse the item, recycle it.
So what does this have to do with crochet? A lot. Because when you add crochet to anything you add fun. Adding crochet to Reduce, Reuse, Recycle is nerd heaven for me. I’m passionate about the Earth and I’m passionate about crochet. While there are lots of ways to reduce your use of plastic, below are a couple suggestions on how you can use crochet to help reduce your plastic use.
First #1! BYOB. Bring your own bag is #1 on the list above and by far the easiest way to cut back on single use plastic. Really any bag will do but if you like, you can crochet a bag or two or more. When my oldest was in kindergarten (he is now a senior in college) I made a bag out of plarn (plastic yarn made from used plastic bags). I love it and it is super strong. I always load it up with cans and jars when I grocery shop. I didn’t use a pattern but there are a bazillion patterns out. A quick Ravelry search yielded over 1,000 market bag patterns.
2. BYOW. Bring your own water bottle. I’m not going to suggest you crochet a water bottle as that would be weird, but you could crochet a water bottle carrier. This would make it a lot easier to bring your own water with you. Here is a quick Ravelry search for water bottle carriers. Next time you go to restaurant and they ask if you would like a drink/straw, you can say, “No thank you. I’m doing my part to reduce the amount of single use plastic waste and brought my own water in this awesome water bottle carrier that I crocheted myself!” or something like that.
3. BYOC. Bring your own cup. Post-covid this one is a little harder as some companies are not refilling reusable cups or offering refills. Like everything, I think this will eventually pass but if you need a coffee fix every day, just brew it at home and bring it to work with you. Or get your own personal coffee machine for your office. I make coffee using a French press and use this homemade cozy to keep it warm while brewing. Or you could crochet a cozy. Skip the lines, save time and money, and make your coffee yourself.
4. BYOL. Bring your own lunch. Pre-covid I would bring my lunch to work and intend to again once I’m back in person next month. I pack it in an old personal sized cooler that one of my boys used to use in grade school. The strap is broken and the zipper is messed up on one place. But it still keeps food cool. So I carry it in-you guessed it-a crocheted bag I made. I use reusable containers for my lunch and do not use single use plastic baggies. I bring real forks and spoons and a cloth napkin.
5. BYOU. Bring your own utensils. This one is my favorite because this one took me awhile to figure out. When we eat out, we often go to casual dining places (pre-covid and we will begin again, eventually). Not quite fast food but you still order at a counter. These places often have plates or baskets that get reused but tend to offer plastic forks/spoons/knives and cups and straws (see above for BYOW) that end up in the trash. The light bulb turned on one day when we were eating out and I now use an eyeglass case to carry my own utensils with me. I keep it in my purse and never need to use a disposable fork/spoon/knife while away from home. Read about it here, Eco-Craft, Plastic Utensil Carrying Case
6. BYOPB. Bring your own produce bag. Yup, there is a pattern for that! Crochet Produce Bags. I never understand the purpose of produce bags. You are going to either peel or wash the produce before you eat it. And you are going to put it in a bag after you check out. One day I watched a guy put bananas in a plastic produce bag and then tie it shut. WHY? They are already bunched together and sealed in a natural wrap that you don’t eat. I’ve seen some people single items in plastic produce bags. One butternut squash in a bag-again, why? you are going to peel it before you cook it. Oh well, not my job to judge. Unfortunately, so much produce is pre-bagged in plastic. But if you feel you need another bag for them, try crocheting a light-weight bag to transport the loose fruit and veggies.
7. Eat at home. I think covid has taught us all that this is not only possible but a great way to slow down and enjoy dinner time. Dinner doesn’t have to be eaten in the car. However, if you can support restaurants and businesses struggling to come back, do. Just do it Eco responsibly and make the trips to fast food the exception, not the norm. Crochet some hot pads and placemats and enjoy a home cooked meal.
Pizza! Pizza!
8. Food storage. No need to buy plastic or even glass storage containers. Clean and reuse what you already have. And why not dress them up while you are at it?
9. Share the tips. Done.
Do you have any other ways you use crochet to reduce plastic usage? I’d love to hear them.
Happy Crocheting and Happy Reduce Plastic Usage! Darleen
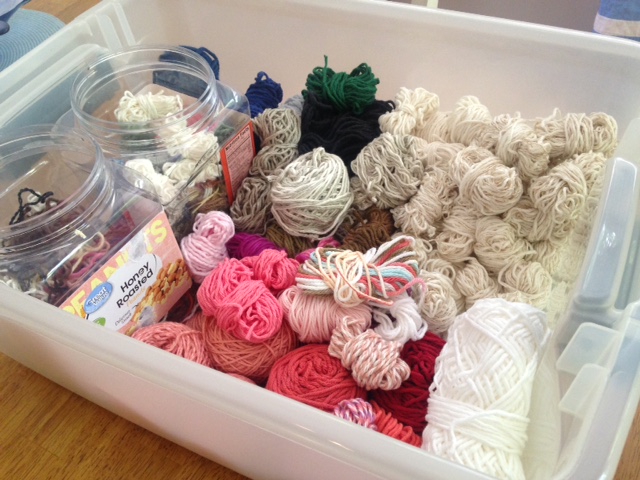
I’ve mentioned before that I am trying to use up my much too large yarn collection. While I’m not near the end of it yet, I had noticed I was getting more and more partial skeins and bits and pieces. I also had a collection of swatches, unsuccessful design WIPS and projects that were abandoned when I realized I didn’t have enough yarn to finish. So I took some time this weekend to work on my scrap yarn stash. I pulled out all the scraps, partial WIPS, design fails and swatches of yarn that had been discontinued. Everything was frogged and balled up. I’ve been inspired by Grace’s Bits and Bobs Mother Bears so I put all the tiny scraps in one bin and the even tinier ones in another. I’ll need to make a magic ball with them at a later date. It was like going down memory lane frogging some of those items. Some dated back to my very first published design, theI Do Blanket, where I was working out different ways to attach the rings.
I’m excited to have this section organized. When a yarn is discontinued, I won’t use it for a new design. The discontinued yarn is what I use when I make Mother Bears or other small items for personal use. Having them all together and ready to use will make it a lot easier when I’m ready to start a new project. I haven’t yet dived into the partial skeins, unsuccessful design WIPS, abandoned projects or swatches of current yarn, but I’ll get to it. For now, they are in the appropriate stash box with full skeins of the same yarn.
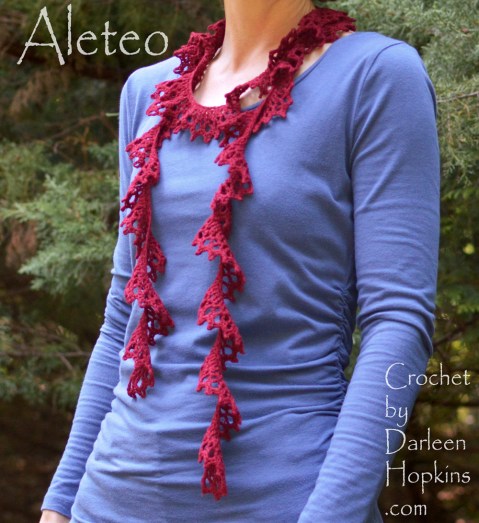
I’m super excited to share the latest #CbyDH pattern! The Aleteo Scarf. This crochet pattern is very easy and is a great introduction to lace crochet. The pattern includes written instructions as well as a chart and works up really quick. I made the sample in a couple hours. It even includes blocking instructions and photos.
Did you know? Aleteo is Spanish for “flutter”.
While I was taking photos of the sample scarf, a baby cardinal was taking her first flight. The nest was located in the bushes next to my front porch. All spring the parents guarded the nest. When I set up my camera and white board for the photos I had no idea what was about to happen. The baby was ready to take her first flight. She flew back and forth over my head searching for a safe place to land. I could feel the flutter of her wings as she passed above me. What fun it was to witness the beauty of nature up close.
You can work this scarf in yarn weights from 1 to 3 (fingering to dk). And you can easily adjust the length and/or number of stitches.
And, like all my patterns, the Aleteo Scarf is included in the Crochet by Darleen Hopkins Buy 2 Patterns, Get a 3rd for FREE! sale on Ravelry. No coupon needed. Enjoy!
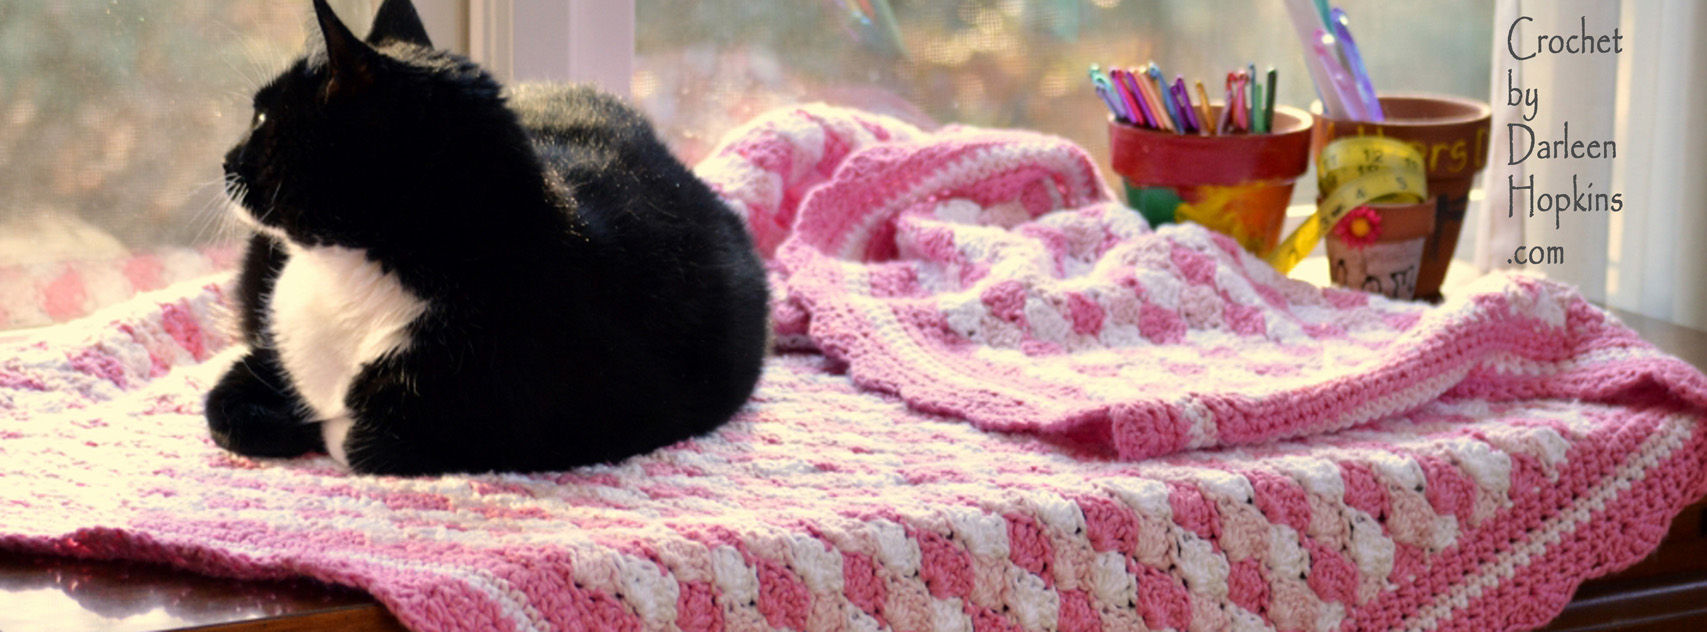
I’m super excited to share the latest #CbyDH pattern! The Tiffany Scarf. Create a beautiful lace scarf with this easy crochet pattern. If you use the suggested yarn, you can make the scarf as it is written with just one ball! Written for fingering weight yarn but instructions are provided to adjust the length for any gauge and any weight from lace to DK. The scarf is stitched the lengthwise. A chart is included with the full written instructions. The entire scarf can be completed in just a few hours.
So, why is it called the Tiffany Scarf? I don’t know! I just thought it fit. 🙂
And, like all my patterns, the Tiffany Scarf is included in the Crochet by Darleen Hopkins Buy 2 Patterns, Get a 3rd for FREE! sale on Ravelry. No coupon needed.
About a year ago, I picked up a used crib. I had asked the manager at a local thrift store to please let me know if she received a crib that she couldn’t resell as I was looking for one to use as a photo prop. She called me a few weeks later letting me know she had a crib and a changing table. She couldn’t sell them because they were recalled. Since I didn’t plan to use them for a baby she said if I was interested she would let me have them for $10. SOLD!
Changing table saved from the trash.
I was super excited. Right away I painted the changing table white and used it for photos and for storage when I wasn’t using it as a prop. Because the changing table worked so well both as a prop and for storage, I decided I didn’t need the crib after all. It spent some time on my covered porch while I tried to determine if I could/would ever use it. When I finally decided I did not need it I recycled the metal springs and posted the wood pieces for re-purposing. I couldn’t bring myself to toss them in the trash as they were in good shape. When nobody responded, I put them under the porch and thought I’d try again in a few weeks. Then this morning, while taking a shower, I had a EUREKA moment; use the crib slats as yarn storage. It was so simple and so awesome! Originally I wanted to hang the slats. I also thought I needed spacers between it and the wall. But when I started filling the slats up with yarn to see if it would really work I realized I didn’t need any of that. Propping it up against the wall is perfect! Easy-Peasy. The room has carpeting in it so it shouldn’t slide at all. AND the crib has another piece just like this!! I plan to pull out the other one, clean it up and fill it up with more of my yarn stash! I know I have enough. One day I will work through all this stash…one day.
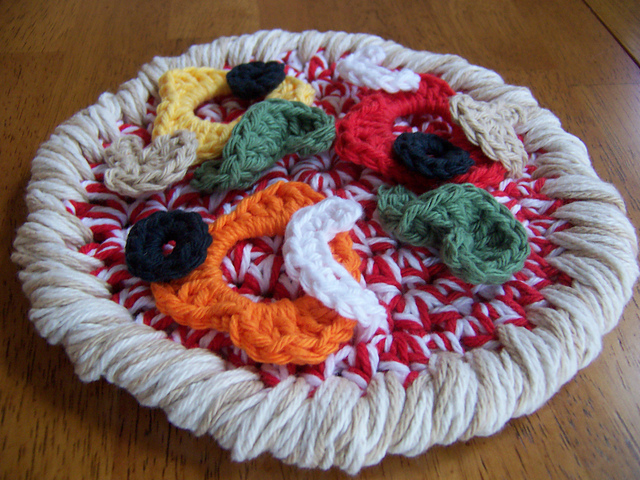
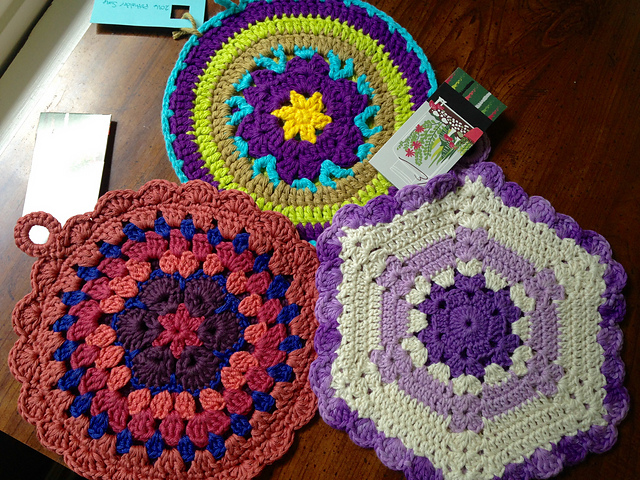
YIPPEE! They arrived! The packaged didn’t even make it to the house before I ripped it opened. And they are gorgeous! In May I posted about a crochet potholder swap (Post 1 and Post 2) and I’m super excited to share with you the three beautiful potholders I received in the swap. I can’t wait for the next one 🙂
The round purple/teal was crocheted by Sybil. The pattern is called Disc Disc.
A while back I posted about men in crocheted pants. That post has become quite a hit-obviously, who wouldn’t want to see men in crocheted pants! I get a lot of emails asking where to get the patterns. And I have always had to respond “Sorry, I don’t know.” Until now.
Pattern and photo by Kirstie Adamson with EcoCreate. Photo used with permission.
These amazing crocheted shorts can now be made with the awesome pattern by Kirstie Adamson. I haven’t tried the pattern…yet. I’m envisioning a pair of capris in blues and greens. I have the perfect yarn. I just need to find the time, and the guts, to go for it. If you decide to make a pair of these shorts, please let me know. I’d love to see them!!! The link for the pattern is here: Crochet Shorts Pattern by Kirstie Adamson. While you are there, check out the website and blog for some great upcycling ideas and tips.