handmade hot pad from upcycled denim jeans

EcoCrafting: Upcycled Denim, Hot Pad from Jeans Inseams

My latest crafting passion is upcycling denim jeans. I’ve been wanting to do this for awhile now but didn’t have a sewing machine capable of handling the thicker fabric. I also don’t have much in sewing skills but I’ve never let me stop that before. 🙂 I recently purchased a used, almost vintage, Bernina sewing machine and really love it. It was a great buy, sold to me by a woman I met at a weekly craft group I attend who really just wanted it to go to someone who would use it and enjoy it. Well, I’ve done that and more. I’ve been playing around with the machine a lot and came up with this fun, thrifty and eco-friendly hot pad.

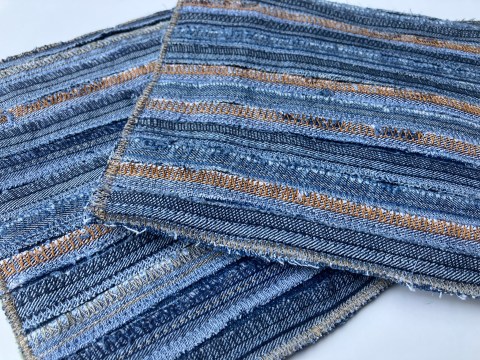
My final hot pads are approximately 9″ by 9.5″ and use inseams from four or five different jeans. Please note, my instructions are not designed to be presented as a professional pattern. I am a beginner sewer and therefore just explaining the steps I used to make the hot pads.

handmade hot pad from upcycled denim jeans

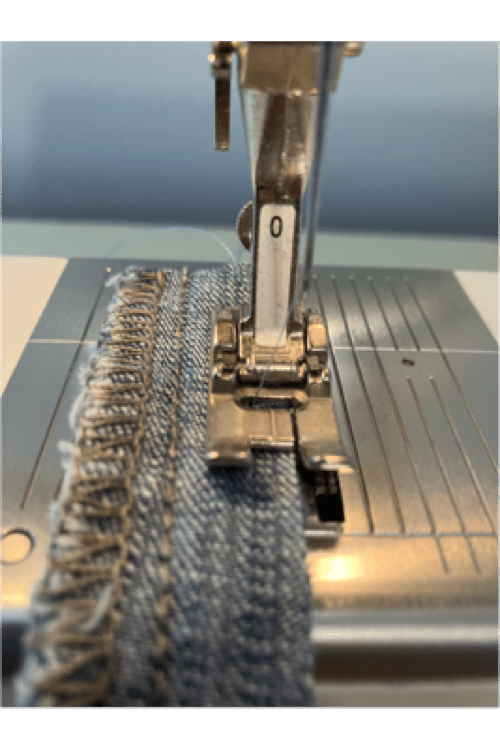
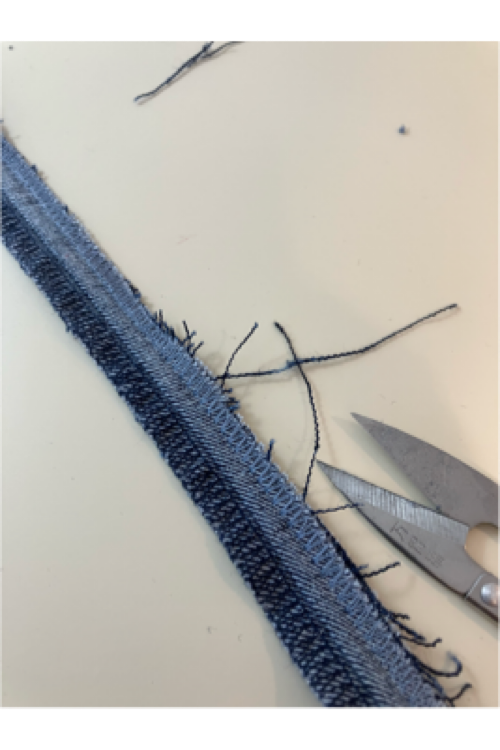
Prepping inseams: Turn the jeans inside out and cut out the inseams leaving 1/4″ of fabric from the inseam. Save the rest of the jeans for another project. Press the raw edges together with an iron. Seal the raw edges of the inseam with a zigzag stitch along the edge using a matching thread. I did two rows of stitching, all the way down and then back up over the same stitches to really seal in the ends and prevent fraying. Trim any loose ends. I used Coats and Clark all purpose thread color #4660 Denim. This color seems to blend in fairly well with most jeans. Once the seams are sealed, cut into 10″ strips and press again to completely flatten and straighten out any curves.

upcycle denim jeans prepping inseam
Seal in ends with two rows of zigzag along raw edge.
eco craft upcycle jeans inseam
Trim any loose threads.

Supplies:
12-13, 10″ inseam strips from four or five different jeans with different colored threads prepped as mentioned above.

2, 10″ by 10″ denim squares. If necessary, sew two smaller scrap pieces together to use on the backside of the hot pad.

10″ by 10″ batting/insulation. I used pieces of an old, damaged, felted 100% wool sweater sewn together to form a 10″ by 10″ square but you may also use quilt batting, old mattress cover, a few layered t-shirts sewn together, or anything that will give enough thickness to insulate from heat.

Contrasting thread, I used a golden brown.

Steps:

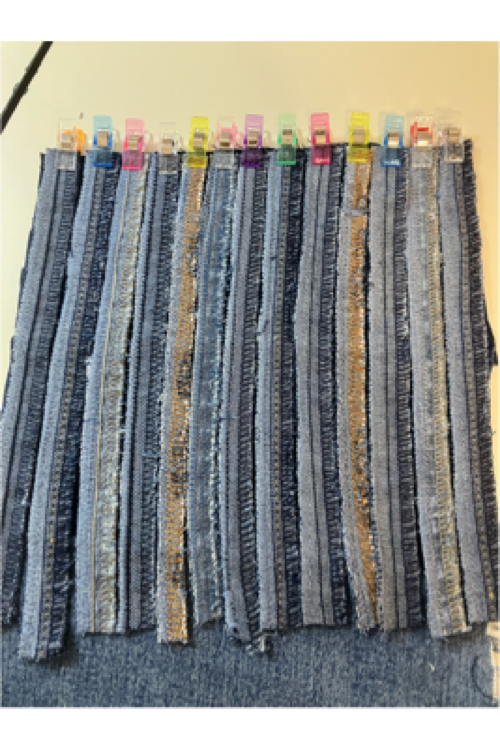
First, line your prepped inseams side by side on one of the 10″ by 10″ denim squares. I used clips to hold in place. With a matching thread, run a quick stitch across one end to secure them to the denim square. Then using a straight stitch, stitch down the middle of each seam.

upcycle denim jeans using inseam for hot pad

Second, layer your second piece of denim square with wrong side facing, then the batting/insulation, then the top piece with the attached seams, right side up. Your batting/insulation should be sandwiched between the two denim pieces with the right sides facing out. Clip together. Trim any pieces that are too long. Make sure all edges are flush.

upcycle denim jeans hot pad from repurposed materials

Third, using zigzag stitch and a contrasting thread, sew around the perimeter of the hot pad securing all three layers. I went around three times I believe.
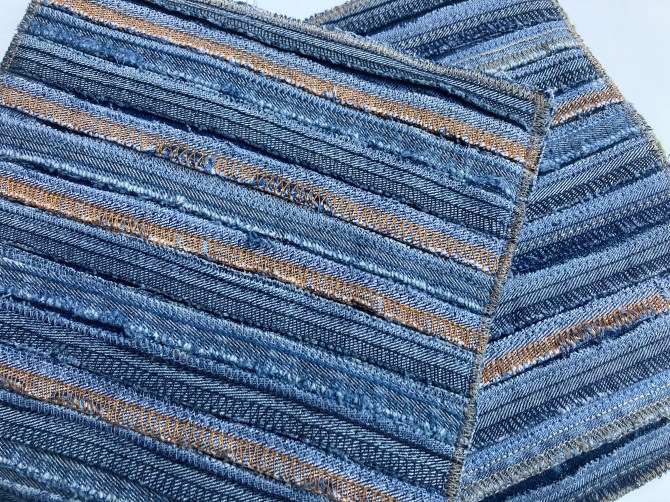


Last, Enjoy!

Note on the jeans I use to upcycle: I buy thrift store damaged/clearance items and rarely pay more than 99 cents per pair. I use all types of denim, most have a mix of cotton, spandex and some with polyester. If my project requires it, I will add interfacing to prevent stretching. My goal is to use as much of the jeans as possible including the inseams, hems, waistbands, zippers and pockets.

crocheted container for plastic cutlery
DIY laptop stand made with mason jars and cutting board

Crochet Enhances a DIY Laptop Stand

Eco-Craft: Making a Laptop Stand from Household Materials

If you follow my blog you know that in addition to crochet I am passionate about the environment. So whenever I feel like I need something new, I often look for environmentally friendly options first. Can I make it? Can I pick one up secondhand? Can I buy a handmade option vs plastic junk? Sometimes there are no great options and I end up having to order online from a big box store, but when I can, I do try to come up with an alternative.

DIY laptop stand made with mason jars and cutting board
DIY laptop stand made with mason jars, cutting board and crochet!

With COVID shelter-at-home orders in place, my work transitioned us all to work remotely. I’ve been working at home for over five weeks now. I really do like it although I am missing my work station. In my office I have a variable height desk and two massive monitors. It’s been an adjustment working on just a laptop, but one that has been surprisingly easy. After a week I realized I needed to raise my laptop to eye level. Too much looking down was bad for my neck. I found a box that was the right height and used that for a couple weeks. But I got sick of looking at that ugly brown box. Stuck at home without access to thrift stores had me initially looking online for a laptop stand. Once I saw how basic and how expensive it was for plastic junk, the DIY in me knew there had to be a better, Earth-friendly option.

Like most projects, I thought about this one for a few days trying to figure out the best way to make the project work. I decided on using four mason jars and an old cutting board. The jars were saved from store-bought salsa. The cutting board was one that I have been meaning to replace. It was old and had started to split as ***someone*** ran it through the dishwasher a few times. Split cutting boards are not good to use as bacteria can get in the cracks. I knew it was important for the jars to have some weight to them to add stability to the laptop stand. I had enough sand for two jars. The third is filled with blue sea glass purchased at least 15 years ago. The last is filled with shells collected from one of our beach trips. The two sand jars were a little plain looking so I added a display of some of the nicest shells in one. The second I decorated with a crocheted motif using stash yarn. This was inspired by my Zinnia Votive pattern. I used the motif from the pattern and secured it with a crocheted band around the back. The cotton and linen yarn (CotLin by KnitPicks) in Raindrop, looks great, is the perfect dusty blue, and contrasts nicely with the white sand. The jars were secured to the cutting board with hot glue. Now when I’m working on my computer, not only is my neck happier, but I am surrounded by crochet and memories of good times with my family at the beach. All for zero dollars and zero impact on the Earth.

DIY laptop stand enhanced with crochet
Crochet used to decorate a mason jar in a DIY laptop stand.
DIY laptop stand with seaglass
DIY laptop stand with sand and shells in a mason jar
Sea shells my family collected on one of our beach trips!

And an added bonus is the space under the laptop. Underneath the stand I placed a basket. Now my computer glasses, cleaning cloth, and lip balm are close at hand but out of the way.

DIY laptop stand made with mason jars and old cutting board decorated with crochet
Ta-Da! an awesome laptop stand!

I purchased a new cutting board to replace the one used in the project. I did have to go online to a big box store but at least it is made from bamboo-an environmentally friendly material.

My office/guest room is the latest room painted in my quest to repaint my whole house. I first blogged about it here and my last post was about the first thing I added to the freshly painted walls in this room. I’ve got a couple more crochet themed projects planned for the office/guest room, if I can ever get to a thrift store for supplies!

You can easily make one yourself. If you can’t find a old cutting board, a book, mirror, or any other solid, flat board will work. Just be sure to add some weight in the supports as you don’t want the stand to be top-heavy. If you are using glass jars, you can fill them with decorative stones, loose change or marbles. Your neck will thank you. 🙂
Happy Crocheting!
Darleen

crocheted container for plastic cutlery